Confessions of an EVERYDAY ECOTARIAN

creative, conscious and conserving ideas, thoughts and solutions

New Blog! But this one’s staying here… December 14, 2011

Filed under: Uncategorized — adm @ 1:36 am

Slowly but surely, over the last couple of years my focus has moved from agrarian and domestic explorations to other things.  I entered the non-profit working world two years ago on a part-time basis, sub-contracting for a number of area non-profits.  In the process, my time, my thoughts and my writing has gone elsewhere.  For the love of writing – and I do love writing – I started a new blog, simply under my name, with no title, no tag and no theme.  It’s just a place to think, and write.

So, although I’m not exactly ‘retiring’ this blog, my posts here will be less. I will still answer any questions, (assuming I have the answer). In the meantime, I hope you’ll join me on my other blog at: amydmartin.wordpress.com

Thanks!

-Amy


The Year’s First Cold-Frame! (Salad in April?) March 1, 2010

Filed under: Uncategorized — adm @ 6:13 pm

Yes!  I did it!  I conquered the winter, got out a shovel, uncovered a patch of earth in the garden and created our first cold-frame for the year!  Actually, in the spirit of full-disclosure, my husband actually did most of the work.  He, being bigger and stronger than I, tends to get more done in a period of time.  So, in the time it took me to drag a few hay bales over to the garden from the barn, he uncovered the garden dirt, dug the double-paned door out from the snow on the side of the barn, carried it over, and brought over most of the hay.   But I can type faster.  That skill doesn’t help me with making cold-frames.

Well, anyway, here is our first cold frame.  It was so good to get a sneak peek at the garden under the snow.  That dirt took us many years of nurturing to bring it to that point.  We’ve added lots and lots of compost and organic matter.  Our natural soil in the area is pretty much straight sand.    -Straight sand and a deep, deep well make for the best water, by the way, like a giant filter.

I planted a variety of lettuces and if things go our way that cold-frame should heat up and we’ll have salad in April.  We’ll also probably have some Hairy Vetch, (Hairy What?!).  Don’t worry its just the cover-crop I planted in the fall.  Its a legume so we’ll probably just eat that, too.  Salad in April, that’s not bad for zone 4 and no heating devices, (other than hay and someone’s building project refuse).


Summer/Fall 2010 in Pictures: George Winston, Grassfire Festival, Vegetables and Other Random Things November 8, 2010

Filed under: Ramblings — adm @ 2:44 am
Tags: , , ,

Oh my.  The last serious blog post I wrote was in June.   My apologies.  It seems my life since June has been a continuous and massive effort in multi-tasking.  On top of my home activities I also happen to work for two non-profits.  One is a local cooperative of non-profits dedicated to the education about our area’s fresh water.  The other is a local branch of a national non-profit that trains teachers how to play guitar and integrate this learning into their classrooms, Guitars in the Classroom.  I started the local branch of this music non-profit and have been running it for two years.  All of this still equates a “part-time” job that sometimes seems more than full-time in actuality.  Once in a while I think of how much simpler, (in many ways, but not all)  it was having a steady teaching job pre-recession and before my layoff.  However, my life is now full of constant surprises.  The continuous flux can be tiring at times but overall, although it often seems I’m working more hours for less money and no benefits, I’m having a lot of fun.

This summer, on top of the “usual” things we also decided to have a music and camping festival at our house.  It was a great deal of fun.  The first night, torrential rains forced all inside my husbands woodworking shop for a tight-fitting yet fantastic concert.  The second night we had several bands play.  I didn’t see my children much the entire weekend because they were running with the 20-something other kids around the property the entire time.  Little did I know at the time, that organizing and executing this festival would be great preparation for what was to come.

In late September I received an email from the Guitars in the Classroom headquarters that George Winston, (one of our affiliated artists) was going to be in town and wondered if I’d like to organize a benefit concert for my local program.  Of course, my answer was yes.  I spent a great deal of time organizing this late September through mid-October.  The solo guitar concert, (yes, solo guitar, George did not play piano this time around…next time) was a great success, nearly a sell-out at a venue that seats 525 people.   George was also a great deal of fun to be with for three days.  He’s quite kind, extraordinarily generous, good with kids and a hoot to be with.  I enjoyed every minute of the planning, preparation and execution of the concert as well as playing host to George for the three days he was here.  By the way, the pictures of George below were taken my friend Tracy at Karuna Photo.

So, with that, a running re-cap of the summer and fall is in order…with pictures, (these pictures are somewhat out of chronological order but the general idea is here…)


11 Things for a Great Efficient Garden June 19, 2010

Filed under: On Food — adm @ 7:25 pm
Tags: , , , ,

Gardening is upon us!  Over the last 10 years due to my nearly obsessive quest for efficiency in just about everything, we have evolved a garden that uses resources, (such as water and time) wisely.  It also happens to grow plants well despite our short growing season.  A few key pieces in our gardening “tool-box” have become essential to this efficiency.   First, a disclaimer:  I’m writing this on little sleep so I’m aiming for coherency but…

Anyway, 11 things for a great, efficient garden (pictures below text):

1. Soaker Hoses – This one absolutely belongs #1.  Soaker hoses put water exactly where you want it, and nowhere else.  This is not only an efficient way to water your garden, but it often keeps weeds at bay as well because you are not watering the weeds.  We lay them out after we plant the plants -or in the case of seeds, I’ll lay the soaker hoses out first, turn them on for a bit and then plant the seeds next to the hose where the ground is wet.  Soaker hoses add both time and water efficiency to a garden.

2. Hose Manifolds – The ideal partner for a soaker-hose watered garden.  Manifolds allow you to adjust your garden in “sections” watering each zone as needed with the flip of a few valves.  It takes a bit to set it up, but once it’s done, it’s done.  This makes the watering process extremely efficient.

3. Kraft Paper – I LOVE craft paper!  We use it to mulch our plants we put in the garden as seedlings.  We lay the paper out in roles, cut X’s in it, fold the corners back and plant a plant in each open space.  We lay the soakers over, (or under) this paper.  The ground stays wet and the weeds stay out.  You have two choices in buying this:  You can buy it as “organic gardening mulch-paper” and pay a premium for it or you can find a home-improvement store and buy “contractors kraft paper” and get twice as much for 1/2 the price.  I’ll let you decide.   At the end of the season, we till it right into the ground where it adds to the soil for the next year.

4. Frost Covers – These are a necessity where we live.  Our growing season can be very, very short and without an early start there are a few crops that may not have time to mature.  I’ve also found that frost covers keep the soil nice and moist for germinating small-seeded vegetable like lettuce and carrots.  They are helpful in the spring, when the night frosts are not yet over and also helpful in the fall when they may begin again.  I’ve also found that they can keep hot-loving plants like peppers a little happier earlier in the season by the slight greenhouse effect the provide.

5. Garden…Claw? – I’m not sure what to call this but it’s great.  You can get a small hand version of this or a larger one with a longer handle.  This is an absolutely useful tool for “tilling” up weeds and even preparing small beds for planting.  Kids think it’s fun too, which means you can trick them into some free labor.

6. Cages/Fence – This is another thing we’ve evolved over the years.  Tomatoes need cages.  Period.  When they are laying on the ground, they aren’t as productive, they are harder to pick and they pick up soil disease way too easily.  Since we plant between 60-100 tomato plants a year we tired of buying traditional cages early on, (that break in a season or two).  So, we came up with these tomato “tents”.  These are made from extremely durable cattle panels, (which can be found at a farm supply store).  They are cut in 1/2’s or 1/3’ds and tied together at the top with zip-ties.  They’re made to keep cows contained so they have no problem keeping our tomatoes contained year after year after year.  You can also use them to grow cucumbers up off the ground, saving ground space.  We’re experimenting with that this year.

7. Sprinkler – Well, ok so this one isn’t very original.  But, it’s also important.  Sometimes there are crops that are watered best with broad-range watering.  In our garden this may be our strawberry or lettuce patch.  We don’t use it often, but its definitely a necessity.

8. Hand-Waterer – Sometimes you just have to water certain things by hand.  Besides, it gives the kids a chance to “give the plants a drink and make them happy”.  They like to get involved and this is a great way for them to get a one-on-one connection with the garden.

9. Sprayer – NO!  Don’t say a SPRAYER!!  Yes, I say a sprayer.  Not all sprayers have to perpetuate biological evils.  I have two sprayers that are also invaluable tools in my garden.  Although our garden is constantly replenished with a good feed of manure every fall, I do like to foliar-feed, (through the leaves) throughout the growing season.  It seems to be a bit more efficient for their nutrient metabolism.  That’s just my observation.  There are a variety of organic products out there for just that -fish emulsion is an example, (although it can smell terrible).  My 2nd sprayer I use for a Neem oil spray.  This is an oil from a tree in India.  It is greatly diluted in water and then sprayed on the plants.  It works against biological disease such as bacteria or fungus as well as insects.  I use it only when needed, for example if I have a pest problem or if it has been rainy and wet for days and I’m going to have an issue with a fungus or mold.

10. Straw – Good old multi-purpose straw.  Now, here is a warning:  Don’t use HAY use STRAW. For those who don’t know the difference, hay is the grass from the field, (and all the weeds and weed seeds in it) cut, dried and baled.  Straw is the cut, dried and baled stalk left over after a grain harvest -so very few weed seeds.  You can get barley straw, oat straw, wheat straw… The bottom line is, straw may grow a bit of the grain it came from but it’s easy to pull.  Hay will grow all kinds of weeds that will encourage a hostile take-over of your garden.

We use straw for two main purposes.  First, we build our cold-frames with them so plants can get an earlier start.  2nd, when the cold frames are no longer needed, we take the straw and use it for mulch under our vines.  At the end of the season it returns to the soil and improves the garden for next year.

11. Old Storm Doors – We pretty much only use these for cold-frames.  However, cold-frames are an important part of our early-season gardening.  Old double-paned windows will work as well.

There you have it, 11 things for a great, efficient garden.  I hope it was coherent, but I can make no promises because I’m not sure I’m actually awake right now.  Pictures below…


Wild Leek Braided Whole Wheat Bread May 6, 2010

Filed under: On Food — adm @ 6:22 pm
Tags: , , ,

As I’ve mentioned before, we love to forage for wild foods around here.  My 8-year-old son has even begun calling foraging trips, “hunting without a gun”.  A trip out foraging recently brought us a multitude of wild leeks and milkweed shoots.  We were hoping for some morels but, no luck.  I could make myself feel better by telling myself that they just weren’t out yet but I know better than that.  The truth is I am horrible at finding morels.  I’m sure it has something to do with my difficulties in focusing on any small area for any length of time.  But, luckily for me leeks are easy to find –and delicious!

At my 7-year-old daughters request we decided to use some of the leeks to make a braided “onion” bread recipe she’d had her eye on.  I’m not great about following recipes, but I did the best I could and the result was quite tasty and very aesthetic.  I will share the recipe below.  Below the recipe are pictures of our bread and pictures from our leek-hunting expedition.  Enjoy!

Ingredients (this is the actual recipe)

  • 1 package (1/4 ounce) active dry yeast
  • 3/4 cup warm water (110° to 115°)
  • 1/2 cup warm milk (110° to 115°)
  • 1/4 cup butter, softened
  • 1 egg
  • 1/4 cup sugar
  • 1-1/2 teaspoons salt
  • 4 to 4-1/2 cups flour, (white, part white, whole wheat, etc.  I like to mix ½ white and ½ wheat)

Filling (this is what I remember doing…no recipe here)

  • Several cups of leeks, tops and all, chopped
  • 1-2 tablespoons olive oil
  • 1/4 (or so?) cup pine nuts
  • 1-2 tablespoons grated Parmesan cheese
  • Salt or tamari to taste

Directions for Filling

  • Lightly toast the pine nuts
  • Cook down the chopped leeks and greens in the olive oil adding salt or tamari to taste.  When cooked down and somewhat cooled, add Parmesan cheese and pine nuts, process in a food processor or something similar until somewhat smooth.

Directions for Bread (these are the actual directions in the recipe but I make my bread dough in a food processor, directions below)

  • In a large bowl, dissolve yeast in warm water. Add the milk, butter, egg, sugar, salt and 2 cups flour; beat until smooth. Add enough of the remaining flour to form a soft dough.
  • Turn onto a floured surface; knead until smooth and elastic, about 6-8 minutes. Place in a greased bowl, turning once to grease top. Cover and let rise in a warm place until doubled, about 1 hour.
  • Punch dough down; turn onto a lightly floured surface. Divide into thirds. Roll each portion into a 20-in. x 4-in. rectangle. Spread filling over rectangles. Roll up jelly-roll style, starting from a long side.
  • Place ropes on an ungreased baking sheet; braid. Pinch ends to seal and tuck under. Cover and let rise until doubled, about 45 minutes.
  • Bake at 350° for 30-35 minutes or until golden brown. Brush with melted butter. Remove from pan to a wire rack. Yield: 1 loaf.

Directions for dough using a food processor (this makes the process quick and easy and therefore often more practical for busy families.  Make sure your processor can handle 4 1/2 cups of flour!)

  • Mix the yeast and a tsp of the sugar in the warm water
  • Meanwhile, put the dry ingredients in the food processor, mix.
  • Mix milk, butter and egg, add to the dry ingredients, mix in processor
  • Allow the processor to run until the dough comes together in one lump, let it run a bit more.   I usually let it go less than a minute at this stage.  If it’s not coming together,  it may be too wet or too dry.  If it’s “sloppy” add more flour a tablespoon at a time.  If it’s crumbly, add more water a teaspoon at a time until it comes together.
  • At this point remove the dough and follow the directions above, starting by letting it rise until doubled.  –They say an hour, I say it depends on how warm your kitchen is so just keep an eye on it.
 

Seed Starting for the Year March 17, 2010

Filed under: Uncategorized — adm @ 1:22 am
Tags: , , ,

Seed starting is one of those jobs that requires me to sit still and do something repetitive.  Normally, I like to keep moving and these kind of projects really drive me mad.  But, for some reason I find this task very settling.  I get the kids involved, we bring dirt inside and make a big mess on the hardwood floors.  In the end, we end up with hundreds of seedlings that will later be transplanted into our garden and eventually bring us food.  I think my kids enjoy seeing their food start from a seed and a dirt-covered floor as much as I do.

Over the years I’ve gone through the seed-starting process a few different ways.  I’ve settled on one that works well for us each year.  Here are the supplies we gather:

  • Seed Starting Mix
  • Plastic Trays and mini greenhouse covers, (like the “Jiffy” kind)
  • Plastic greenhouse “cells”
  • Spray Bottle
  • Seeds

I’ve found that using seed starting mix is the very best ways to get the seedlings off to a good start.  Other soils are made to hold water and can keep the soil too compact and too wet for optimal seed germination and early seedling growth.  Although I’ve tried making my own starting pots I’ve found that the plastic cells, trays and mini greenhouse covers are easy, cheap and work fantastically for getting the seedlings off to a great start.  I use these cells, trays and covers again and again for several years.  The spray bottle is a great way to water the seeds in and to water the young seedlings as they grow.  This is a task I give to my kids without fear because it is very difficult to over-water with a spray bottle!

Here is the process we go through to get our seeds started.  Again, its a process that we’ve worked out that seems to work well for our kids.  I assign them each an age-appropriate task and let them go!

  • Put seed starting mix in the cells (great for a toddler!)
  • Put 2 or 3 seeds in each cell (an older child with better fine motor skills is best for this)
  • Gently touch the seeds and lightly tap them into the soil
  • Lightly sprinkle a little more seed starting mix on top
  • Water the seeds in with a spray bottle
  • Cover with the plastic cover, put in a sunny warm place, keep moist, (but not overly wet) and wait for the seedlings to emerge!

Once the seedlings are growing, tip the edge of the cover up with pencils or a ruler so they don’t get too warm.  When they have grown a few leaves beyond their “first” leaves, take the cover off entirely.  At this point we usually water from the bottom, pouring water in the tray as needed.  It keeps the top of the soil from getting too wet which very easily leads to a fungus problem.  Many plants will need to be transplanted into bigger pots at some point.  We usually use big plastic cups with holes drilled in the bottom for drainage.   We also use these cups year after year after year.

Below, some pictures of this years future garden plants.


Cold frames, winter sowing and other ways to get a jumpstart on the growing season February 16, 2010

It may not be time to get those tomatoes growing just yet but this is a great time to plant some cold-hearty vegetables even in the colder climates.  I live almost halfway between the equator and the north pole and even I can get a jump on a few crops this time of year.  The plants I love to get started as soon as I can are peas and lettuce.  Baby lettuce greens are such a luxury in my world in the winter so I am especially pushed to get those growing.  There are a couple of ways to do this.  One of my favorite ways is to build cold frames with straw or hay bales and old double paned windows.  These cold frames are easy, quick and only involve finding recycled doors and/or windows and using straw that can later be used for mulching plants in your garden.  Its as simple as creating a warmer environment for the plants than your climate allows at that time in the season by insulating them with the straw and the windows.  Here are some pictures of my cold frames, (as well as the milk-jug sowing I’ll talk about next) from last year, some of our garden seedlings and my curious then 1.5 year old son.

If you don’t happen to be married to someone who salvages any potentially useful thing from a variety of places you may not have what you need to build a quick cold frame.  That’s ok!  You can still do some “Winter Sowing” -or planting seeds while the weather is really too cold for them to grow.  Another quick way to do this is to use a variety of plastic containers for mini greenhouses.  A friend of mine who didn’t even grow up in an area with winters introduced me to this idea.  You can use old milk jugs, fruit clam-shell cases and more.  For more detailed instructions check out WinterSown.org.   They have a great deal of helpful information on the topic AND an opportunity to get free seeds.  -Yes free.  Last year I received many different lovely species of heirloom tomatoes and a few peppers  -all delicious.   Here are a couple of pictures of plants I grew in milk jugs.  Simply cut a slit around the bottom third of the milk jug, poke holes in the bottom for drainage and fill the bottom portion with seed starting mix.  Then, put your seeds inside.  At this point, tape up the slit in the milk jug and put the cap on.   This is my favorite part:  put it outside somewhere.  I love to just stick mine on top of a snowbank. Last year I put a few on top of the ice in our pool.  It makes me feel as if I am conquering winter.  Anyway, watch it every day and when the seeds germinate take the cap back off.   Then, watch your seeds grow.

The premise behind winter sowing is that by planting the seeds directly outdoors with a little help with heat conservation (either by cold frame or mini-greenhouse like a milk jug) you are allowing the seeds to germinate and grow as they would in nature.  This is opposed to starting the seeds indoors under a light or in a window where they just don’t get the same amount of sunlight.  Winter sown plants end up being heartier and healthier in my opinion.   Although I do use my cold frames to grow plants I can eat early in the season, (like lettuce) I also use them to start and/or grow seedlings I will later transplant in our garden when the danger of frost has passed.   They do seem to be healthier this way and it keeps the hundreds of seedlings out of my house where who-knows-what could happen to them at any time.

The time is now so get yourself a milk-jug, some lettuce seeds and get winter-sowing!


Mushrooms, Fungus Among us in the Winter Months January 4, 2010

Filed under: On Food — adm @ 3:19 am
Tags: ,

My first button mushroom!

I love to grow things.  The problem is, in the middle of Winter, there isn’t much I can grow in my climate without producing extra heat and light.  I’m just not into that -too much money, too much hassle too much wasted energy.  Even my cold-frames at this point in the year are very…cold.  So this year, I tried growing something I hadn’t grown before:  Mushrooms!

Not the psychedelic kind.  I grew good old-fashioned Agaricus bisporus, the common button mushroom.   If I was a purist I would have made my own mushroom compost, bought spores and propagated them myself.  However, sometimes I like things to be easy and I always find value in learning things from someone who’s already figured it out.  So, I bought a mushroom kit.  In my mushroom kit box came a bag of composted, sterilized horse manure, (no worries, just fluffy “peat moss-ish” soil) a bag of inoculate and instructions.    I was instructed to take the inoculate and soak it good with water until very sloppy.  Then, I took that sloppy goo and spread it over the compost layer -like a mushroom lasagna, (only before I actually had mushrooms).  After that I was to cover it with plastic and let it sit somewhere cool until I could see spider-web like fungus spreading across the top.    It took several weeks and I ended up having to move it somewhere warmer but it did eventually happen.    At that point I opened the plastic waited for the little tiny white pin-heads to appear scattered in groups across the compost.    Here will be my one word of advice from my vast mushroom growing experience:  watch those mushrooms like a hawk once they start to appear.  Many of mine grew out of control big in only a couple of days!  Our community leopard gecko named Geckie really seemed to enjoy climbing on our overgrown mushroom. Oh, and by “community” I mean that we share him in different seasons with other families.  We have him now because we have a nice warm wood stove that keeps him toasty during the winter.

See the fine "webbing" the fungus makes to the right of the pins? This is the first indicator of mushroom activity

Our community-shared leopard gecko on one of my grossly overgrown button mushrooms.

All in all growing mushrooms was a fun experience.  The kids really enjoyed it and they were able to do the work themselves since it only required occasional misting with a plant mister or spray bottle.  The speed with which the mushrooms mature also keeps kids on their toes and they will check that box everyday for a new mushroom to harvest.  I also found that my kids were especially interested in eating the mushrooms they had harvested. My 2-year-old insisted on munching on them raw.  Then again, I find as a general rule, that kids are very interested in eating things that they help to grow or see growing.  It must be in our nature to want to have that basic understanding and connection to our food in order to trust it and want to

Cute little button mushroom pin heads

consume it.   One other piece of advice.  If you talk to someone who actually grows their own mushrooms then you’d better learn-up on your mushroom varieties and Latin mushroom names if you want to keep up.  They apparently don’t use common names for mushrooms.  I bounced some questions off of a local who grows mushrooms and felt rather uniformed having to ask things like, “Is that the one with the umbrella-thingie on the top?  Do they sell that one in the store?  Are you sure you can eat that one? etc…”.   We can’t all be mycologists, I guess.    In any regard, whether or not you know their Latin names, mushrooms are a great and fun thing to grow in the winter!


Eating Your Backyard (or Foraging is Fun!) November 11, 2009

I, being an obsessively resourceful person, happen to think that foraging for things to eat that grow from the earth without any human intervention is one of the most satisfying things I could possibly do.  It’s a fantastic way to get out into nature and really understand the environment around you, (because if you’re going to wild-forage you have to understand your environment or you could end up dead).   It’s something our ancestors did not all that long ago.   But somehow, in the ever-increasing gap between people and the origins of food many of us have lost our ability to hunt and/or  gather.  Now I’m not going to be talking about hunting in this post, (or probably ever, for that matter).   It’s not something I have any ethical issue with, it’s just not something that I or anyone in my family does.  Well, there was that one time my husband took a deer but it was with a very expensive bullet -his truck.  Being the obsessively resourceful people we are, we did process it and put it in our freezer.  However, I don’t recommend hunting with your vehicle as a great way to put meat on the table.

Anyway, foraging for me gives me this great sense of awe for the life around me that exists without anything I’ve done to make it that way.  To walk out of a field or the woods with something my family can eat really makes me think about how so much of what we have in all of life we get for free out of no merit any of us have earned.   I think when we are so separated from the origins of food one thing we really loose is the appreciation for what we’ve been given for nothing we’ve done.  When you walk into a grocery store with money in your pocket that you’ve earned from working and buy your groceries it’s easy to feel a sense of entitlement.  I earned the money, I bought the food = I’m entitled to this food.    But I don’t think that’s really all that indicative of reality.  If anything it’s a simplistic and cheapened reality.  Because the truth is, you didn’t earn the money to make the sun shine or the rain fall.  You didn’t plan a training session to teach the micro-organisms to break down the dead and turn it into new life.  The bees aren’t such fantastic pollinators because you’ve done such a great job managing them.  Yet, without these things the food wouldn’t be in the grocery store for you to buy to begin with.   So much of life is given to us and for me, foraging is a great and concrete reminder of this.

Here is a sampling of what I found this summer.  But first, a disclaimer:  Although there are many safe things to forage don’t go out and eat things you’re unsure of.  Make sure you know what you’re doing or are with someone who knows.

“Wild” Apples

These may not be exactly “wild”.  This year I got apples from two different orchards that had been unkempt for quite a few years.  However, in the past I’ve also gathered apples from trees that happen to grow on the side of the road or randomly in the woods.  Often times these apples are misshapen, a little wormy and otherwise just plain ugly.  However, with a little work they are great for applesauce, apple butter or apple jelly.   I’m always constantly amazed at people who say things like, “You can’t eat those apples, those haven’t been taken care of for years!”  Apples are apples, I say and I can eat them wild or not.   Besides, if they’ve grown wild for several years then I know that no pesticides have been used on them.  They are free “organic” apples.  It’s completely worth taking the time to peel them, slice them, clean them up and make them into applesauce.  Applesauce is one of the easiest things to make and can at home.  This year we made over 2 gallons of applesauce from wild apples.

“Wild” Grapes

These can be actual wild grapes or again, grapes from vines that haven’t been used in years.  The grapes in my pictures are Concord grapes that are from unkempt vines.  Wild grapes are smaller and more tart -but often great for juice or jelly.  Unkempt grapes are easy to spot because of their size.  However, wild grapes do have a somewhat dangerous lookalike, the Moonseed plant.  This is a vining plant like the grape but there are a couple of important differences.  Grapes have a couple of small seeds inside while the Moonseed plant has one big crescent-shaped seed, (thus, “Moon”seed).  Birds can eat them with no harm but humans cannot without severe abdominal pain.
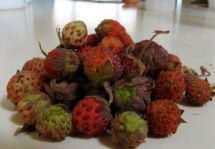
Wild Strawberries

This is a really safe little plant.  There isn’t anything else that I know of that looks like a strawberry but a strawberry.  They love to grow in sandy places where everything else seems to struggle for life.  My kids are out picking them everyday in mid-summer.  If you can gather enough they make a great jam.   They are tiny but pack a powerful little strawberry punch compared to what we find in the stores.

Autumn Olives

AOhand

A few Autumn Olives

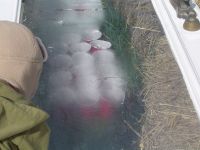
Red berries in the wild can be a dangerous thing.  However, as a general rule, it’s a good idea to stay away from red berries on weeds, (like Nightshade) while berries on woody shrubs and bushes are more likely to be edible, (but that doesn’t mean they’ll taste good).  Also, just because you see birds eating a berry doesn’t mean you can.  Watching bats feed will actually give you a better idea of what we can eat.  However, again, it’s not foolproof.  Luckily the Autumn Olive is an easy plant to identify if you know what you are doing.  It’s a woody shrub with silvery elongated leaves that resemble those of the olive tree.  It can grow up to 20 feet.  In America it’s an invasive, (but delicious!) species and can take over a field.  It does very well in poor soils because of the way it fixes nitrogen in it’s root system.  It comes from Asia and was introduced around 1830 as a potential commercial crop.  Why it isn’t a commercial, I’m not sure, because it’s a fantastic and prolific little berry.  It has a delightfully sweet, tart and almost spicy flavor reminiscent of cloves or cinnamon.   I found a field just full of these bushes this year -every shrub with branches heavy with berries.   The juice is a wonderful bright pink color and so is the jelly made from it.  It not only tastes good, it’s absolutely beautiful to look at.   It also happens to be a great source of natural lycopene.

Morel Mushrooms

Ah, mushroom hunting.  It can be really fun or really frustrating.  For me it tends to be frustrating but this year I actually found a few.  Morels are fairly easy to recognize.  Although, again, mushroom hunting is not something you should attempt to do unless you are quite confident about your identification skills. The morel grows in the forest, (most of the time, it sometimes makes up it’s own rules).   It pops out of the ground the best when the days are wet and the nights are warm.  They are frustratingly difficult to find due to the fact that they blend in with their environment extremely well.  We usually just eat the ones we find but you can also dry them and use them later or sell them for $50/lb on the side of the road to passing tourists who will pay that much.
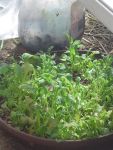
Purslane

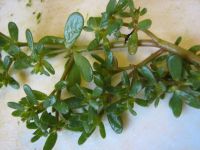
Ah!  This one is fantastic!  It grows almost everywhere in the world as a weedy ground cover.  It’s also eaten in most places in the world other than the US.  It has a delightful lemony flavor later in the season, (in the beginning of the season it just tastes like…well, a weed).  It also is one of the highest plant sources of Omega 3 fatty acids.  The type of fatty acid it contains in high levels is similar to the kind found in fish.  You can juice it, throw it into salads, put it on a sandwich, and more.  I actually like it in Tabouleh. In fact, in my favorite cooking book, The Joy of Cooking, it’s actually listed as an ingredient!

Mint

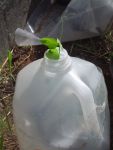
This is something else I wild-forage and use in many ways.  You can often find it growing near a stream or a body of water.  It’s easy to tell what it is because it’s…minty.  There are many kids all with slightly different flavors.  I gather mint all through the summer and use it in tea, tabbouleh and the occasional mojito.  You can even store your mint cuttings in water and they will grow roots.  You can plant these rooted stems if you’d like them to take over your yard.  Otherwise, the fact that they grow roots allows for you to keep a little mint alive a long time in a glass of water in a windowsill.

St Johns Wort

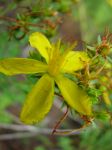
This one is an herb.  It’s often everywhere you look and you’ve probably stepped right on it at some point in the year, (depressing, isn’t it?)  It’s a weedy yellow flowering plant.  Gather the plants when they are in full flower and dry them.  At that point you can use the plants for tea.  St Johns Wort tea is often known as “liquid sunshine” perhaps because of it’s bright yellow color or because of it’s stated ability to improve your mood.  I saved some for the long, cold, dark months of winter this year.  I’ll let you know how it works.

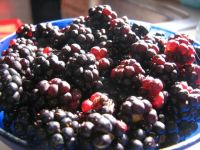
Blackberries/Black Raspberries/Red Raspberries

This is another wild plant that is easy to identify because they look like nothing else.  All are found in thorny patches of briars.  Blackberries tend to be low to the ground with huge, leg-gashing thorns while Black Raspberries and Red Raspberries tend to grow higher with more delicate thorns.  Blackberries come off the stem core intact while Raspberries, (black and red) leave the core on the plant and come off the stem “hollow”.   They are usually easy to find and easy to pick.  Don’t pick them all, however, because the wildlife often relies on them for food.  Also, if you happen to be picking where there are bears keep an eye out, they are fellow omnivores who like them too!

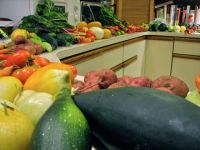
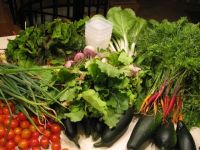
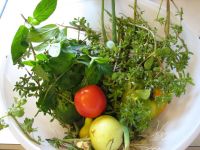
There are many, many more plants I could list and perhaps I will in the future.  But for now, some pictures of this summers wild harvest.


Attack of the Tomatoes! October 21, 2009

Filed under: On Food — adm @ 1:32 am
Tags: , , , , ,

I’m finally writing!  I’m finally writing!  It has been several weeks of steamy days in the kitchen canning, drying and putting away the summer’s harvest.  On top of that I seem to have found myself doing work of one sort another for 5 different non-profits.

canner

Oooh, steamy!

Needless to say, it’s been busy ‘round here.  To further complicate matters we had a very cold and wet

summer.  This caused our tomatoes to ripen very late.  We then had a hard frostand had to move in the tomatoes from our 70 plants in late September.  We had every surface in the basement covered with ripening tomatoes well into this month.  However, the onslaught of tomato preservation is slowing and as always, we’ve learned a few news tricks this year.

When we first started living the gardening, canning, and ever-evolving ecotarian life 9 years ago we did what many new gardeners do.  We planted everything we could think of, lost most of it to inexperience and attempted to preserve the rest.  That first year we had a particularly good crop of tomatoes.  We thought we’d make all kinds of tomato products:  salsa, all kinds of marinara and spaghetti sauce, diced

All colors of tomatoes ripening in the basement after a hard frost

All colors of tomatoes ripening in the basement after a hard frost

tomatoes, barbeque sauce, ketchup and more!  Although we were somewhat successful we burned ourselves out on canning right away.   We’ve learned a few things since that and now we stick to two rules for preserving the harvest:  1. Keep it practical.  2.  Keep it simple

We found that if we preserve the simplest tomato products possible we can then alter those tomatoes for different uses during the year.  Also, when you can you need to be mindful of the acidity of your product.  Tomatoes by themselves are high acid and can be canned in a simple boiling water bath.   However, when you start adding other vegetables it can lower the acidity too much and cause the need for a pressure canner.   So, because we like to keep things as simple as possible, this year we decided to stick to chopped tomatoes, tomato sauce and dried tomatoes.   Here is what we did:

Roasted Tomato Sauce

In order to make great, smooth tomato sauce you need to do three things.  Remove the skin, remove the seeds and remove some of the water.  I used to cook the tomatoes down in a stockpot before running them through a food mill to remove the seeds and skin.  Not anymore.  I’ve found a much better way to get a great tasting sauce is to roast the tomatoes first.  Simply wash the tomatoes, cut out any bad spots and quarter them.  You can use any kind of tomato for this –even a surplus of cherry, pear or other small tomatoes.  Just to dispel the long-standing myth,

oventoms

Tomatoes ready for roasting!

sauce1
Smooth sauce cookin’ away

yellow tomatoes are not any less acidic than red so throw them in there!  Put them on a baking dish lined with foil or better yet a foil roasting pan, (unless you want a huge cleanup job later) and roast them at 275 degrees for about 2 hours.  I even threw a few cloves of garlic in to roast along with the tomatoes.   When the tomatoes are soft and have lost some of their water run them through a food mill to remove the skin

roasttoms

Roasty Toasty Tomatoes

and seeds.  Put the remaining sauce back into the stockpot and cook it down until it’s as thick as you like it.   Then, just can it in a boiling water bath for 45 minutes.   The end result is a lovely, deep and complex roasted tomato sauce.  When you’re ready to use it, open it up and season it with garlic, peppers, onions or whatever else your recipe calls for.

naked maters

Naked little tomatoes

Chopped Tomatoes

Nothing fancy here.  We remove the skins by plunging the tomatoes in boiling water for 30 seconds.

Then we pull them out and give them an immediate dip into an ice bath.  At this point their skins slip right off.  We then chop the tomatoes in our food processor, (the best kitchen tool we’ve ever purchased) for a few pulses.   When the tomatoes are sufficiently chopped we put them into a stockpot and heat them to boiling.  Then, we can them in quart jars in a water bath for 45 minutes.   That’s it.  Then they are chili, enchilada, marinara, even salsa ready!  Just season appropriately when they’re needed.

Dried Tomatoes

tom3

Yellow Pear and Cherry Tomatoes

These are great to have on hand.  This year we had a plethora of small tomatoes including little round cherry tomatoes and adorable tiny yellow pear tomatoes.

You can throw them in with your tomatoes for saucebut what we’ve found is that they make lovely dried tomatoes.  We use a dehydrator and simply wash the tomatoes, cut them in half and place them face up on the trays.  When they are sufficiently dry, (You can’t squeeze a drop of moisture out with your fingers) we

“pasteurize” them in a 175 degree oven for 15 minutes.  This helps take car

e of any little organisms that might decide to cause your tomatoes to spoil.

tom2

Pretty little dried tomatoes

Store them in an airtight glass jar in a cool, dry place.  Or for fun, store them in olive oil. You can also dehydrate tomatoes in the sun and in the oven.